Envira Gallery Blog
Digital Photography Tips, Tutorials and Resources
Digital Photography Tips, Tutorials and Resources

by Waseem Abbas on Mar 2, 2021
Do you want to properly optimize your images so your website loads faster? You may be concerned about losing the quality of your images in the process. However, following a few simple techniques can help you to maintain the quality of your photos, while reducing their file size for the web. In this article, we will share how to optimize your images for the web.
There are two methods we recommend for optimizing your images for the web:
Method 1: Use a WordPress Plugin
Use a WordPress plugin to automatically optimize every image you upload. The plugins we recommend are…
Method 2: Use Photo Editing Software
Use a photo editing tool to optimize your images prior to uploading them. The tools we recommend are…
For a full list check out our Best Photo Editing Software list.
Ready to get started? Let’s begin with the first method: using a WordPress plugin.
The Compression Tool directly inside Envira Gallery lets you to optimize your images and reduce their file sizes.
The image compression tool is available for users with any paid Envira Gallery subscription (Pro tier or higher).
If you’re using Envira Gallery Lite, head over to our documentation to learn more about upgrading your Envira Gallery license.
If you’ve already upgraded, you’ll just need to update the Envira Gallery plugin before you can begin compressing your images.
Learn how to set up the new Compression Tool inside Envira Gallery so that you can speed up your website and page loading times.
Below, we’ll show you how to use the WP Smush plugin to optimize the images we upload to WordPress. However, we highly recommend using Envira Gallery’s built-in compression tool.
First thing you need to do is go to Plugins » Add New from your WordPress backend.
In the search bar, you should write ‘WP Smush’ and press the enter key.
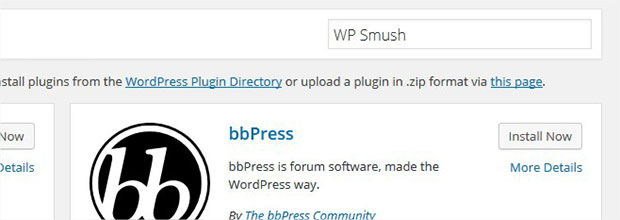
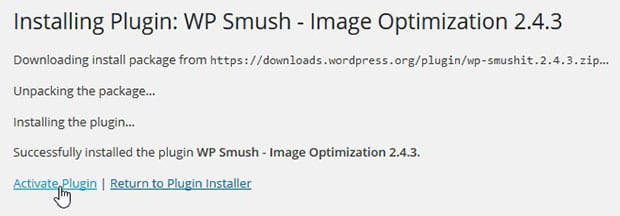
Next, simply click on the Install Now button to install the plugin.

Now you can click on the Activate Plugin link and the plugin will be activated.
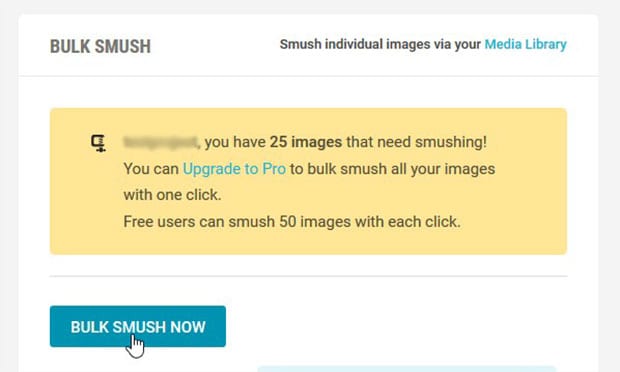
WP Smush automatically optimizes all newly added images after the activation of the plugin. However, you can go to Media » WP Smush to optimize previously uploaded images (you can optimize up to 50 photos at a time.)
If you don’t like the WP Smush plugin, you have other options. Here are two other plugins we recommend for the job…
1. EWWW Image Optimizer

EWWW Image Optimizer allows you to optimize the images automatically when you upload them in WordPress. You can change the file format using this plugin, so it gives you the size you need for your site.
2. Optimole

Optimole has over 70,000 users and is a freemium service that offers resizing, compression, CDN, lazy loading, and more.
3. Imsanity
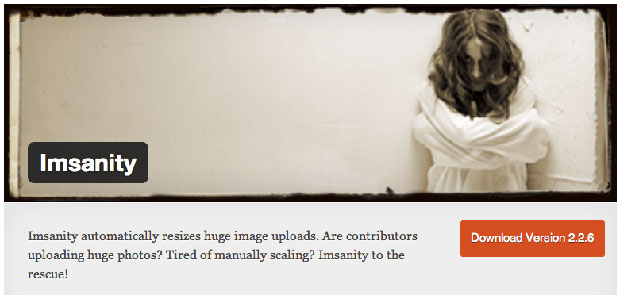
Imsanity is a WordPress plugin that helps you resize your bulk images to optimize them for a fast load time. You can choose a default size for your photos. You can also compress JPEG images, and convert photos from BMP to JPEG, or PNG to JPEG.
The Problem With This Method
Unfortunately, WP Smush and other plugins can only reduce the size of the image by about 10%. Really big images will stay heavy after optimization, and this will effect the load time of your website.
Also, plugins like WP Smush don’t give you absolute, complete control over how your images are optimized, unlike method number 2 (explained below).
We recommend optimizing your images outside of WordPress for the best results. WordPress have limited features, however, photo editing software like Adobe Photoshop or Lightroom and GIMP have plenty of features to optimize your images.
First thing you need to do is open your image in Photoshop or Lightroom.
You should press Alt + Ctrl + I to open Image Size window. Simply check mark the Constrain Proportions, so it keeps the width and height in proportion.
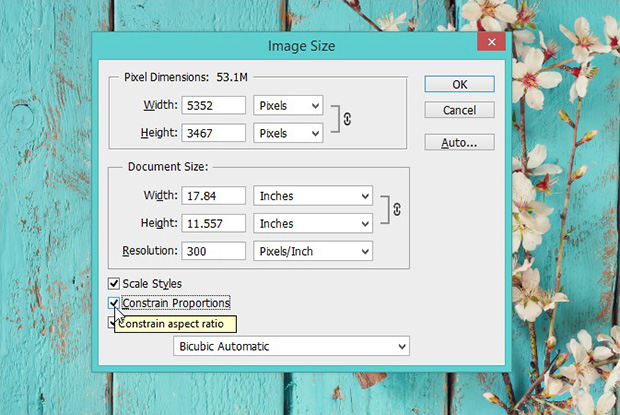
Reduce the size of the image by width to fit your website’s standard blog featured thumbnail size. You will see that the height will adjust automatically.
Next, go to File » Save for Web.
It will open a window where you will see the settings to save your photo. You can optimize file format, manage quality, and more.
You can check the quality of the optimized image in the preview.
Once you are satisfied with your settings, click on the Save button and it will ask you where to save the image on your computer.
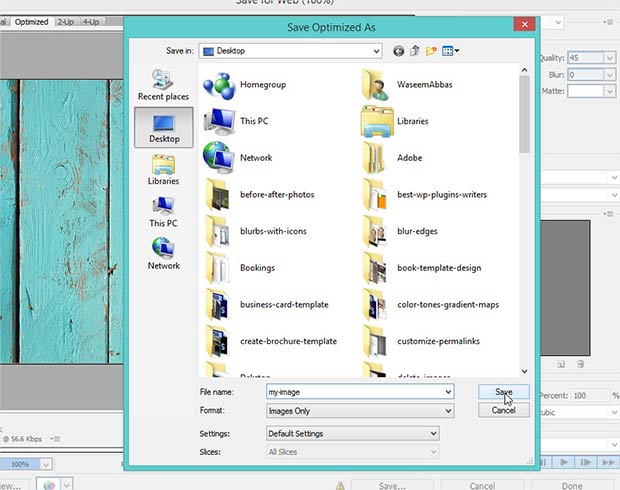
You can now upload this file to your WordPress Media Library for use on your website.
Photoshop and Lightroom can be little expensive, but the features are worth it and you will have full control over optimizing your images. However, if you don’t want to go for a premium method to optimize your images, then we recommend that you use GIMP.
GIMP
![]()
GIMP is free to use and optimize images similar to the steps above for Adobe Photoshop. You can save images for web and use them to speed up your page load times.
That’s it! We hope this article has helped you to learn how to optimize your images for the web. You may also want to check out our other post on 9 best free image optimization tools for image compression, and this ultimate guide to WordPress speed and performance.
If you like this article, then please follow us on Facebook and Twitter for more free WordPress tutorials.
Envira Gallery helps photographers create beautiful photo and video galleries in just a few clicks so that they can showcase and sell their work.


Hello Envira,
why do you recommend resizing to the size of a thumbnail, isn’t that very small?
Thanks,
Stefan
Hi there, great article and many thanks 🙂
I’m optimising gallery images and there are several hundred of them each time from an event.
I firstly use bulkresizephotos.com to bring the ratio down to about 2000px and then use tnypng.com to compress the filesize (this works on jpegs too)
What I am hoping to find out…. what is considered to be the optimum filesize and dimensions for images on a site built with WordPress?