Envira Gallery Blog
Digital Photography Tips, Tutorials and Resources
Digital Photography Tips, Tutorials and Resources

by Waseem Abbas on Feb 12, 2018
Do you want to create an image gallery with categories? You may need to add the filters to your images and display them accordingly with the given tag. In this tutorial, we will share how to create a WordPress gallery with category filter.
By default, the WordPress image gallery has no option to display filters for photos. However, you should use a plugin like Envira Gallery that has tons of amazing features to create an image gallery with categories and a lot more.
To create a WordPress gallery with category filter, you’ll need to follow these 4 steps:
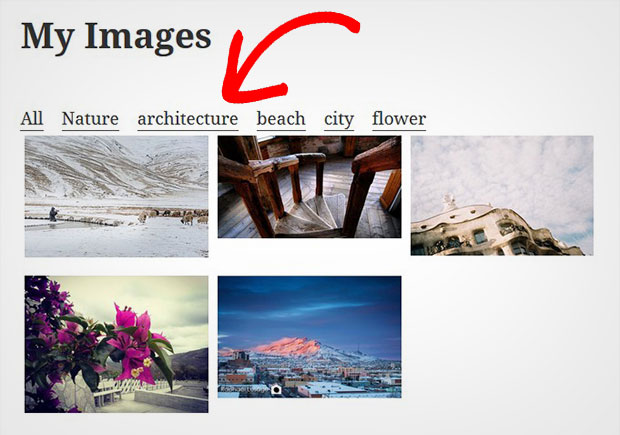
By the end of this tutorial, you’ll be able to create an image gallery with category filter that will look like as shown in this image below:
Ready to get started? Let’s go!
The first thing you need to do is to install and activate Envira Gallery plugin on your WordPress website’s admin backend.

Don’t know how to do it? You should check out this guide on how to install Envira in WordPress sites.
Upon activating the plugin, you need to go to Envira Gallery » Addons to install and activate Tags addon.
To access this addon, you must have Envira’s Plus or higher license. Wondering how to get it? Simply upgrade your license from here.
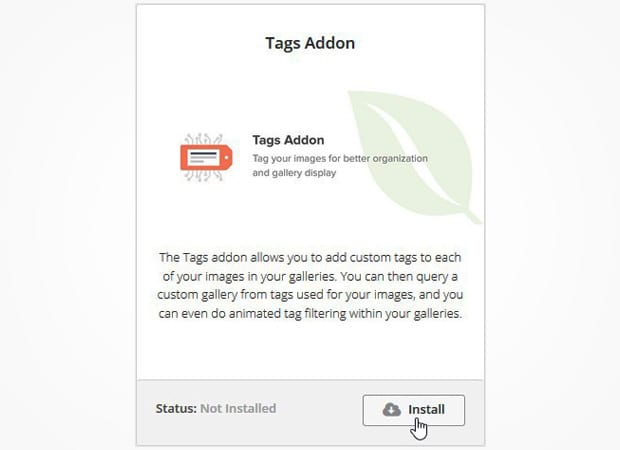
This addon will help you to easily add category filters in the image galleries.
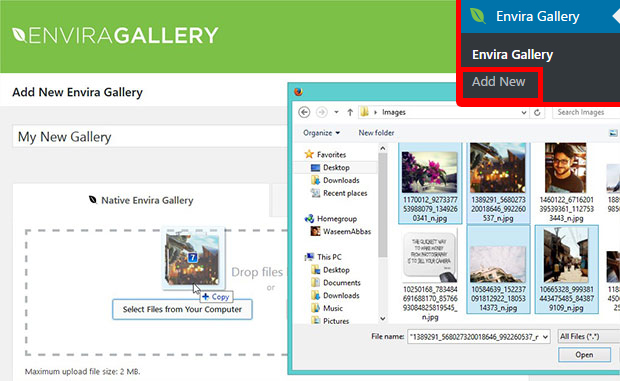
After installing the addon, you need to go to Envira Gallery » Add New to create a new image gallery on your site. Start by adding a title to the gallery and drop the photos in the Native Envira Gallery section.
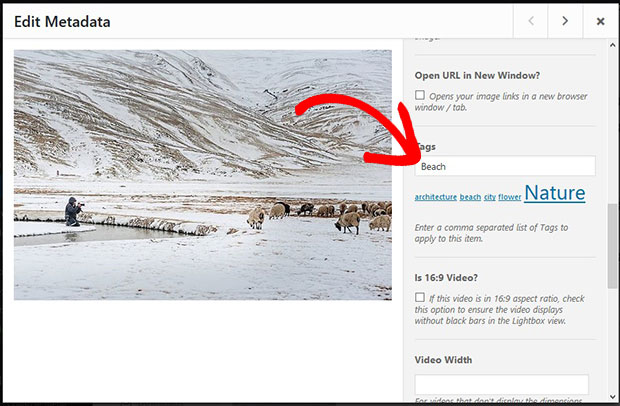
Now scroll down to Tags section and check mark on Enable Tag Filtering to see the category filter options below.
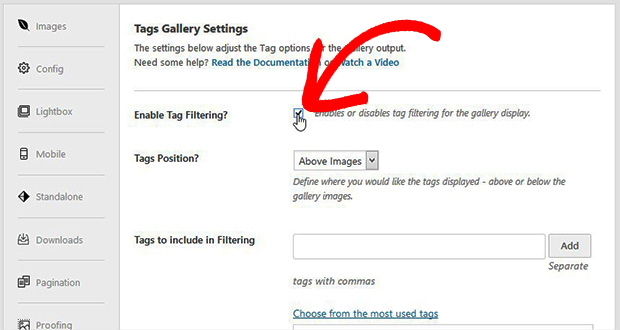
These settings include tags position, tags to include in filtering, all tags option and more. Next you should go to Images tab and edit the images one by one to add the filters.
Once you are done with adding the tags, go ahead and click on the Publish button. For more settings, you should check out this guide on how to create an image gallery with thumbnails in WordPress.
You’ll see a new Envira Code widget right below the Publish widget. Copy the shortcode from here.
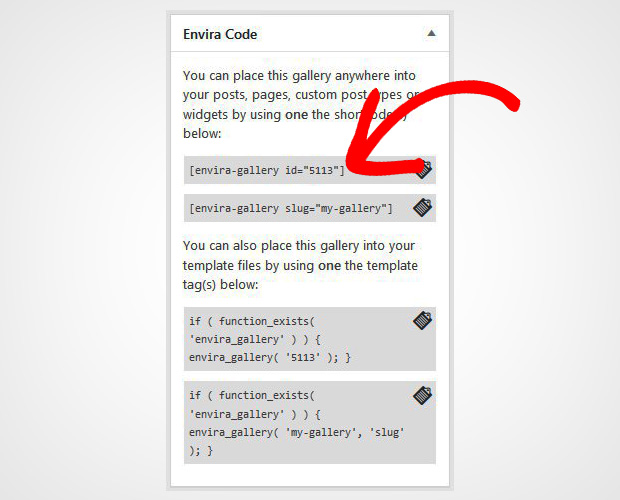
Next you should go to Pages/Posts » Add New or edit an existing page/post. In the visual editor, simply paste the shortcode.
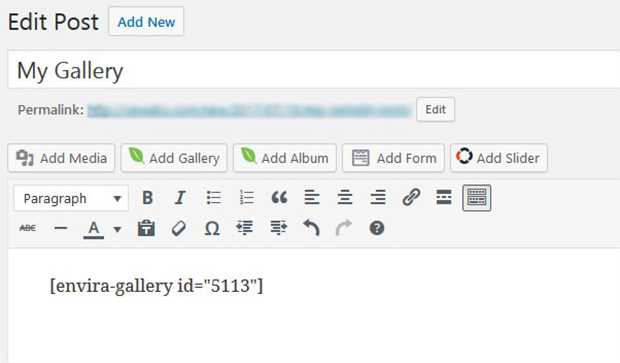
Make sure to hit the Publish/Update button. You can visit your site to see the image gallery with category filter that will look like as shown in this image below:
That’s all. We hope this tutorial has helped you to learn how to create a WordPress gallery with category filter. You may also want to check out our guide on how to create an event gallery in WordPress. In case your image gallery is not ranking in the search engines, we recommend you to check this guide on how to optimize your WordPress images for SEO.
If you like this tutorial, then please follow us on Facebook and Twitter for more free WordPress guides and resources.
Envira Gallery helps photographers create beautiful photo and video galleries in just a few clicks so that they can showcase and sell their work.